The Simplest Brew will walk you step by step in an easy to understand way showing you everything you need to know about brewing a simple American Pale Ale.
Ingredients (≈$16)
3lb Light Dry Malt Extract(DME)
1oz Cascade Hop pellets
Safale US-05 yeast (or similar)
Granulated or Corn sugar
Equipment ($46*)
A lot of the equipment can probably be found cheaper at your local homebrew store. These prices were found online. We always recommend supporting your local homebrew shop.
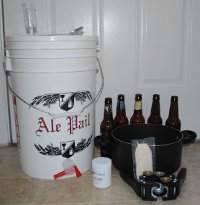
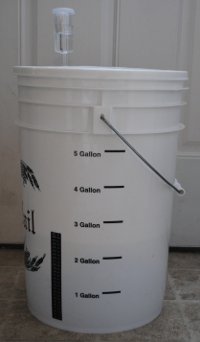
Bottling Bucket ($13)
Air Lock ($1)
Sanitizer ($3) - This will last a long time
3qt Pot (≈$26 if you don't already have)
Spoon (come on, you should have a spoon)
Measuring Cups ($10)
Capper ($12)
Oxygen Absorbing Bottle Caps ($4 for 100)
24 Bottles ($13**)
*The equipment price only includes the cost of the bottling bucket, air lock, sanitizer, capper, bottle caps, and bottles. It assumes that you already have a 3 quart pot, spoon, and measuring cups.
**This price can be decreased by saving non-twist-off bottles that you drink or by asking your local bar or pub to save bottles for you. Do not use twist-off caps as the capper will probably break the bottle during capping.
Expectations
Original Gravity: 1.040
Final Gravity: 1.012
ABV: 4.4%
IBU: 40
Lets Get Brewing
1) Considerations
When you get a new bottling bucket you will want to make sure it doesn't leak. To do this, just put a gallon to a gallon and a half of water in the bucket and check the spout to see if it is dripping. If it doesn't drip, you are good to start brewing. If you do have a leak, you can try tightening the spout to see if you can stop the leak. Finally, if tighting the spout doesn't work, you can use some sealant around the spout to seal it. However, the sealant will have to have time to dry so it is recommended that you check your bottling bucket a least a day before brewing.
The other option to using the bottling bucket as a fermenter is to buy a standard fermenting bucket as well, which is essentially a bottling bucket without a spout. After fermenting in the fermenting bucket, the beer would be carefully transferred to the bottling bucket trying not to disturb the yeast on the bottom of the bucket. Then the bottling bucket would be used as in this tutorial. Keep in mind this is the typical method, but it does add about $10 to the cost of the equipment.
 2) Sanitizing
The first step to any brewing anything is to sanitize your equipment. The easiest route to take for sanitizing is to use some no rinse sanitizer. Typically, a tablespoon of sanitizer will be mixed with a gallon of luke warm water, but you should follow the directions on the container. Mix the sanitizer and water in your fermenter, then put all your brewing utensils in the bucket and let sit for the recommended period of time (usually around 15 minutes).
3) The Boil
Ok, now we are going to start the actual brewing. Start by measuring 1.5 quarts (6 cups) of water and start heating it on the stove. At this point medium heat should be sufficient. While the water water is warming up, add 3 pounds of Light DME.
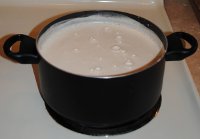
When adding the DME, pour slowly and keep stirring to try and avoid clumping. Towards the end of the bag of DME, you may need to start increasing the heat to disolve more of the DME into the water.Once all the DME is completely disolved in the water, you have what is called the Wort. Essentially it is a big pot of two-row barley flavored sugar water.
Be very careful as the wort approaches boiling because there is always a chance of a boilover.
Now you will bring the Wort to a boil. While you are waiting for the Wort to reach boiling, it is a good idea to get your first hop addition ready. To do this, simply put .5 oz (≈2 tablespoons) of hops in the muslin hop bag. Tie the bag closed leaving room for the hops to swell during the boil. Once you add the bag of hops, take note of the time. This hop addition is referred to as the 60 minute addition since it will be in the boil for 60 minutes. The purpose of this addition is to extract as much of the alpha acids as possible from the hops to bitter the beer.
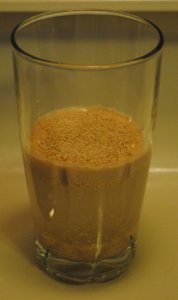
Now it's time to play the waiting game. Wait for 45 minutes from your first hop addition, occasionally stirring to prevent carmelization of the sugars in the wort. After 45 minutes, add the second hop addition of .25 oz (≈1 tablespoon) of hops by using the same techinique used for the first hop addition. This addition is considered the 15 minute hop addition because it will be in the boil for 15 minutes. It's purpose is to add some hop flavor to your beer. At this point, you should also put your yeast in water following the recommendation on the yeast packet.

Time to wait again. This time only for 10 minutes. After 10 minutes, add the final hop addition of .25 oz (≈1 tablespoon). This will be the 5 minute hop addition and will give the beer some hop aroma.
Five minutes after the final hop addition the wort the boil is done. Now is time to move on to the fermentation.
 4) Fermentation
Start by putting 1 gallon (16 cups) of cold water in your fermenting bucket. Now dump your boiled wort into the fermenter too. Next, bring the volume to 2.5 gallons by adding more cold water. Make sure you use cold water. This brings down the temperature of the wort so it won't shock or kill the yeast.
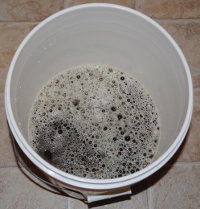
Now stir the wort vigorously and add the yeast. Yeast needs oxygen for fermentation and stirring helps oxygenate the wort. Next, put the lid on the bucket and put the airlock in place. Fill the airlock with water to the line marked on the air lock. Put the bucket in a cool (around 70 °F) room and out of the sunlight.
Fermentation is now under way. The beer will need to ferment for about two weeks. You should notice the bubbles in the air lock within a day or two. The amount of bubbling varies between yeast types and even between yeast batches so don't worry if you feel like you air lock isn't bubbling very much.
5) Bottling
Now that you have a delicious beer you probably want to carbonate and bottle it because no one wants to drink a flat beer out of a bucket. Well... almost no one. Instructions for bottling your beer can be found over at the
Bottling Tutorial.
 Bottling Bucket ($13)
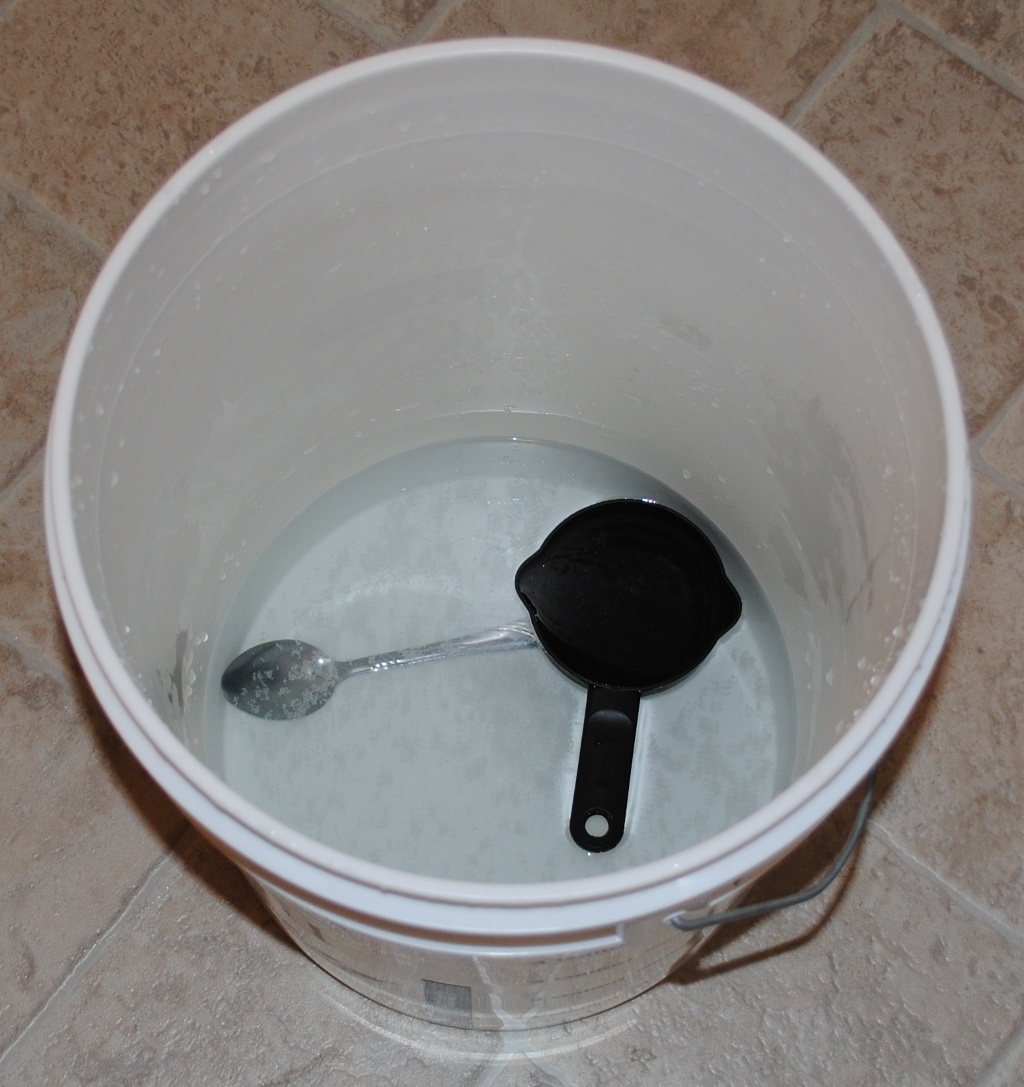 2) Sanitizing
 When adding the DME, pour slowly and keep stirring to try and avoid clumping. Towards the end of the bag of DME, you may need to start increasing the heat to disolve more of the DME into the water.Once all the DME is completely disolved in the water, you have what is called the Wort. Essentially it is a big pot of two-row barley flavored sugar water. Be very careful as the wort approaches boiling because there is always a chance of a boilover.
 Now you will bring the Wort to a boil. While you are waiting for the Wort to reach boiling, it is a good idea to get your first hop addition ready. To do this, simply put .5 oz (≈2 tablespoons) of hops in the muslin hop bag. Tie the bag closed leaving room for the hops to swell during the boil. Once you add the bag of hops, take note of the time. This hop addition is referred to as the 60 minute addition since it will be in the boil for 60 minutes. The purpose of this addition is to extract as much of the alpha acids as possible from the hops to bitter the beer.
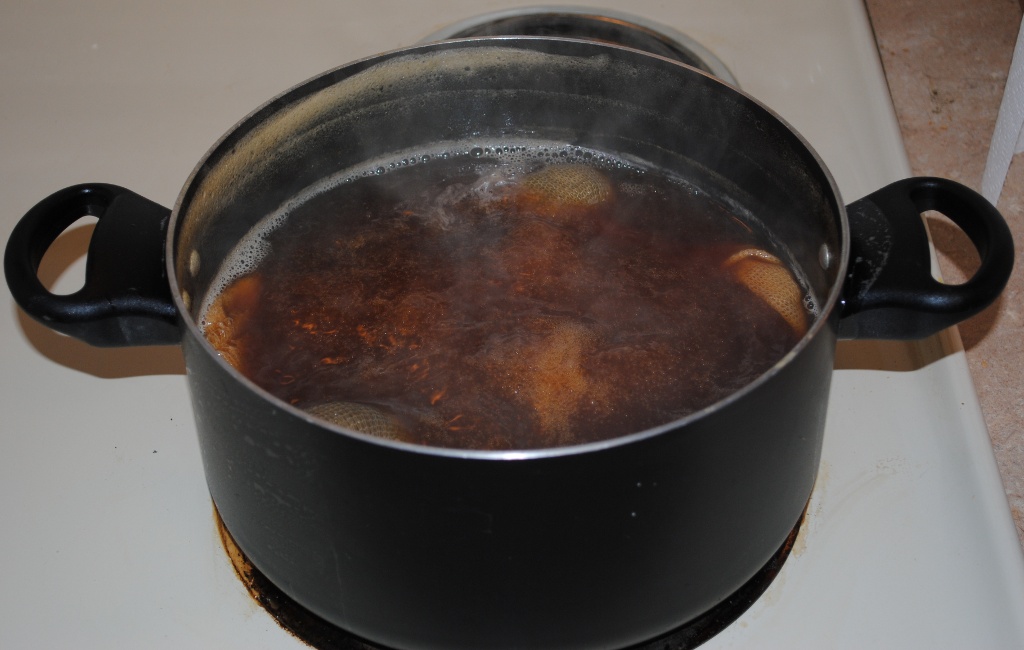 Time to wait again. This time only for 10 minutes. After 10 minutes, add the final hop addition of .25 oz (≈1 tablespoon). This will be the 5 minute hop addition and will give the beer some hop aroma.
 4) Fermentation
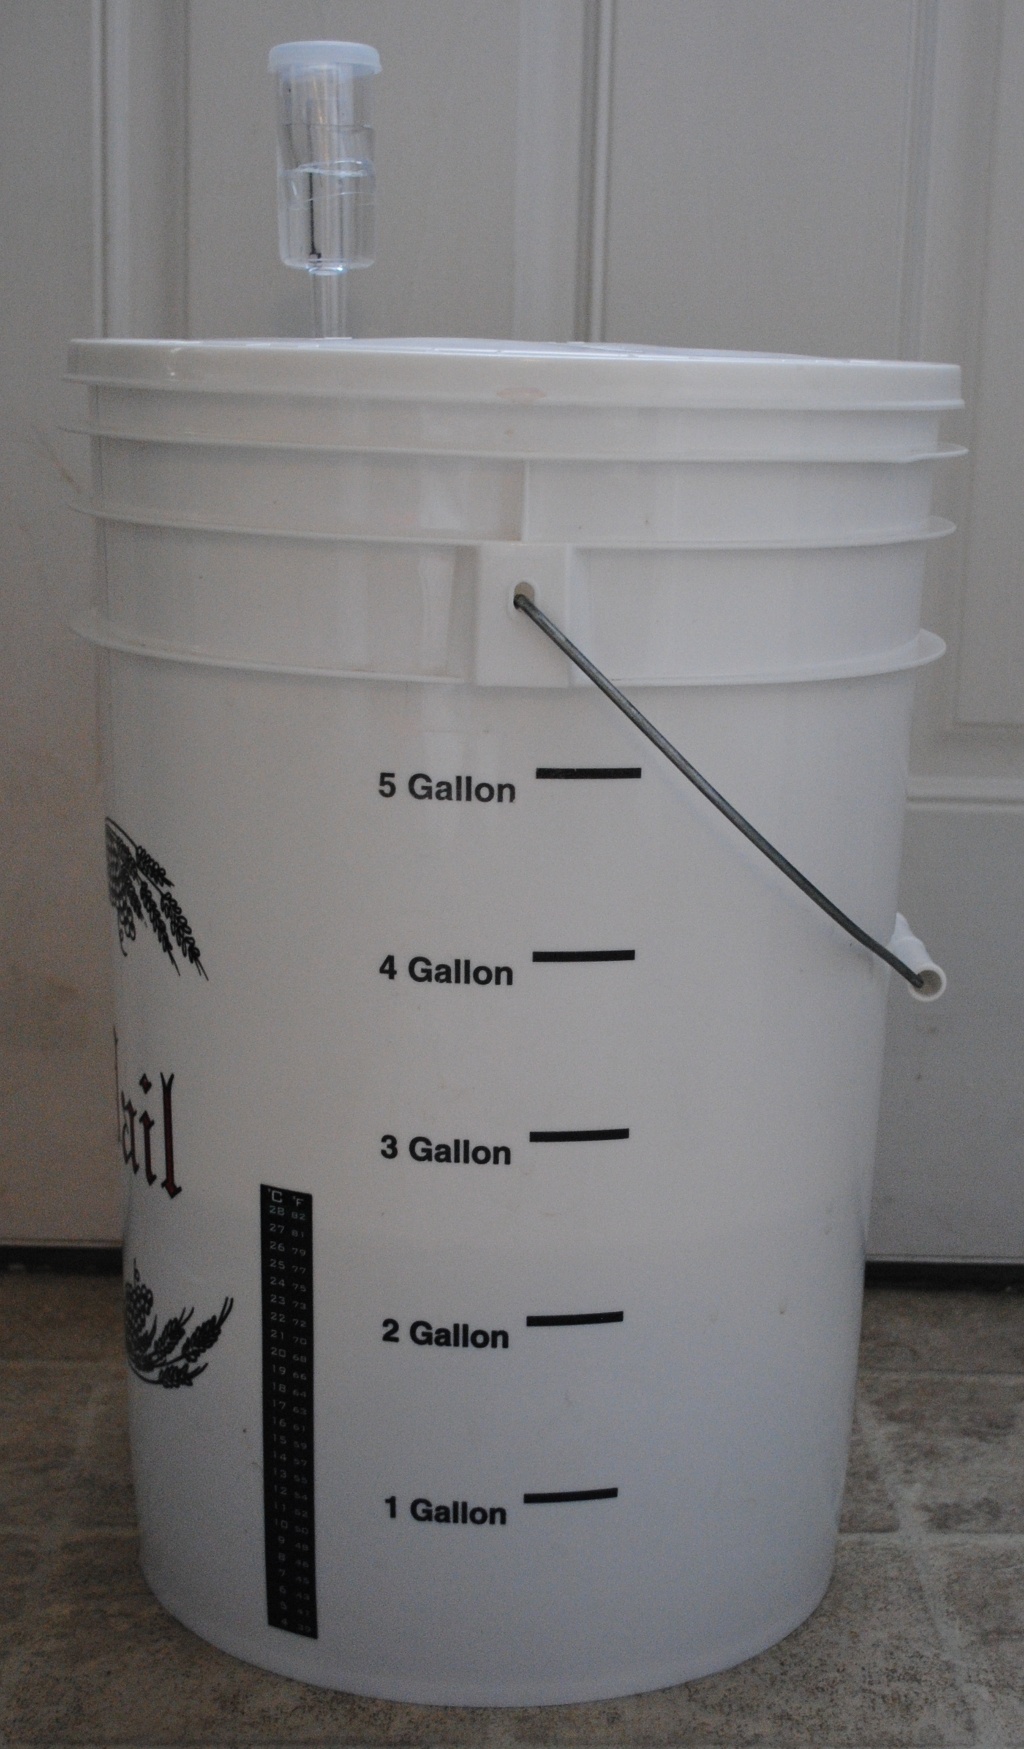 Fermentation is now under way. The beer will need to ferment for about two weeks. You should notice the bubbles in the air lock within a day or two. The amount of bubbling varies between yeast types and even between yeast batches so don't worry if you feel like you air lock isn't bubbling very much.