All grain brewing doesn't have to be an expensive endeavor. It will however take about an hour for you to construct. If you don't want to build your own you can buy a mash tun and lauter tun a little more money. If you are just getting started with all grain brewing and don't want to build your own, Phil's Lauter tun is a good place to start but rest assured, building your own isn't too much work.
The purpose of the cooler Mash/Lauter tun is the same as a standard lauter tun setup. However, you will do your mashing and sparging in the same cooler instead of using separate containers. To extract the sugars from the grain you can use the standard mash then sparge using a sparge arm technique or you can use the batch sparging method. This tutorial will be for the batch sparging method.
Some may have concerns about the efficiency that a cooler can have compared to a standard, more expensive mash and lauter tun combination. Well good news. Most people experience efficiencies of 70-75%, on par with a standard mash/lauter tun.
 What You'll Need (≈ $42)
Cooler (at least 30 qt, ≈ $30)
6 feet of 3/8 inch tubing (≈ $2)
Braided Steel Faucet Connector (≈ $5)
4 Small Worm Clamps (≈ $3)
In-line Valve (≈ $2)
Tools
Scissors
Screw Driver
Pliers
Drill with 3/8 inch bit
Rotary Tool with Metal Cutting Tip (recommended)
Sealant (optional)
Instructions
1) Drill The Hole
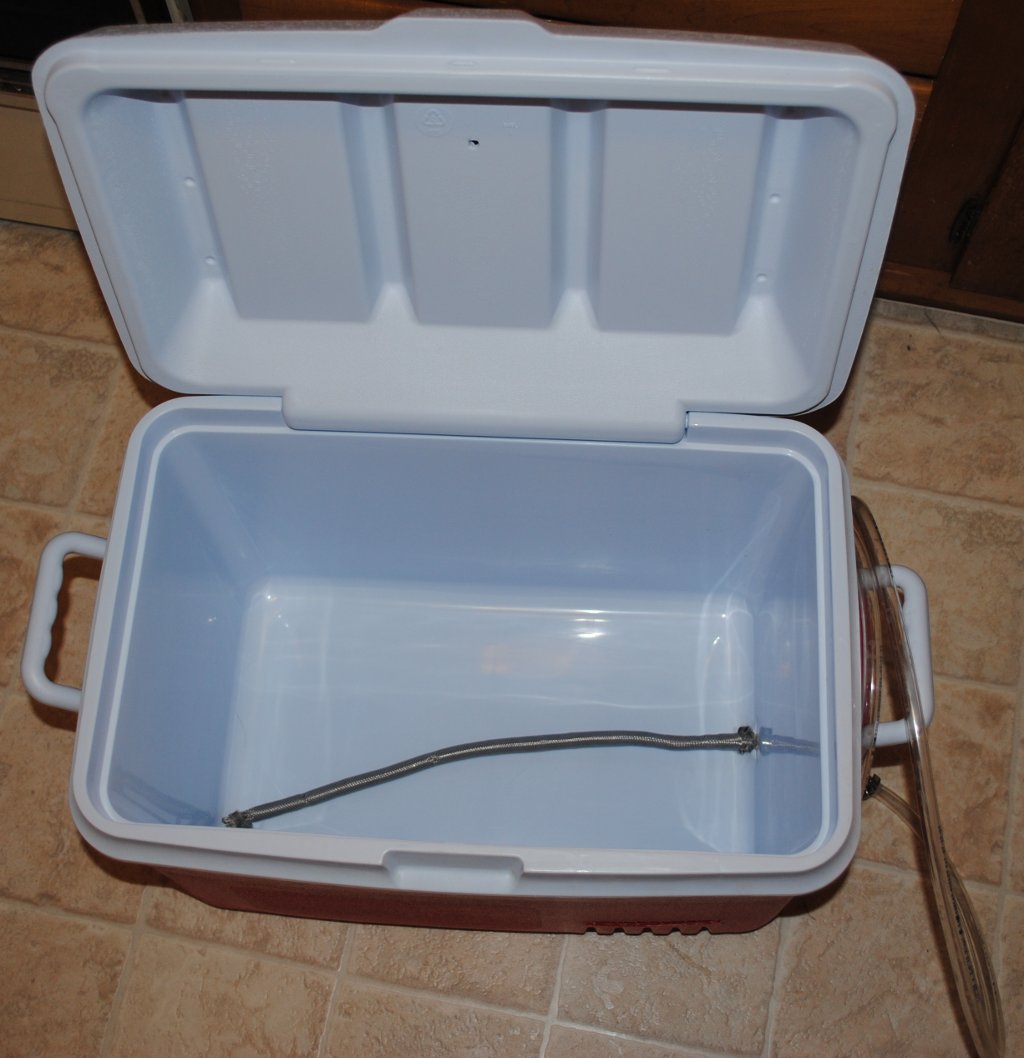
First you will have to drill the hole in the cooler. When you do this you will want to keep the hole as low as possible on the inside as possible. If the hole is to high on the inside, you will lose out on some of the delicious wort in your cooler. To drill the hole, just use your drill with the 3/8 inch bit to drill through the side of the cooler. Once this is done, clean up the hole as well as you can.
 2) Create Your Filter
Now you will create the filter part of your mash tun. There are multiple ways to do this. Some people like to create a copper manifold by cutting slots into copper tubing. A simpler way is to use the braided steel that is used for your standard bathroom faucet hoses. This method is easier to make and easier to clean.
To create the filter, you first must saw or cut off the ends of the hoses. The easiest way to cut off the threaded connecter is to use a rotary tool with a metal cutting tip to saw off both ends of the hose. If you don't have a rotary tool, tin snips or a hack saw would probably work just as well. Once you have the ends off, the fun part begins. You must remove the rubber hose from the inside of the steel so water can get through the braids. To remove the rubber hose, you can grab the rubber with pliers and slowly work the steel off the other end of the hose.
3) Adding The Tubing
Now its time to make a way to get the wort out of the cooler. To do this, push or pull the tubing through the hole in the cooler. If you are having trouble getting the tubing through the hole, try using needle nose pliers. Simply poke the pliers through the hole, from inside to outside of the cooler. Then pinch the end of the tubing and grab it with the pliers. Now the tubing should pull through the hole easily. Pull about 3 inches of tubing inside the cooler.
Once the tubing is through the hole, its time attach the filter. Simply slide the braided steel filter you created over the end of the hose inside the cooler. Now secure the steel with a worm clamp. Also fold the end of the steel and secure with a worm clip. This will keep your grain from flowing in the end of the braided steel and out of your mash tun.
4) Adding The Valve
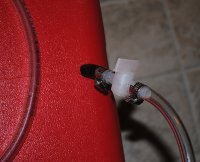
Pull the tubing out until the braided steel on touches the inside of the cooler. Now cut the tubing a couple inches away from the outside side of the cooler. Put a worm clamp over the tubing attached to the cooler then shove one of the barbed sides of the valve into the tubing. Now tighten the worm clamp to hold the valve onto the tubing. Now attach the rest of the tubing onto the other barb of the valve and clamp together.
5) Testing
Now you have a fully functional mash/lauter tun. Before you use it, its a good idea to test it to see if it leaks. Just pour some water into the cooler. If you are really lucky the cooler won't leak at all. If you aren't so lucky, water will start dribbling out from around the hole in the cooler. A quick fix is to use some electrical tape wrapped around the tubing and pushed into the hole in the cooler. This however isn't a permanent fix. A much better solution is to use a little bit of sealant around the outside of the cooler around the tubing.
Now you should be good to go. Enjoy the fruit of your labors and make a nice all grain beer. If you are concerned that you don't know anything about batch sparging, a tutorial can be found
here.
 What You'll Need (≈ $42)
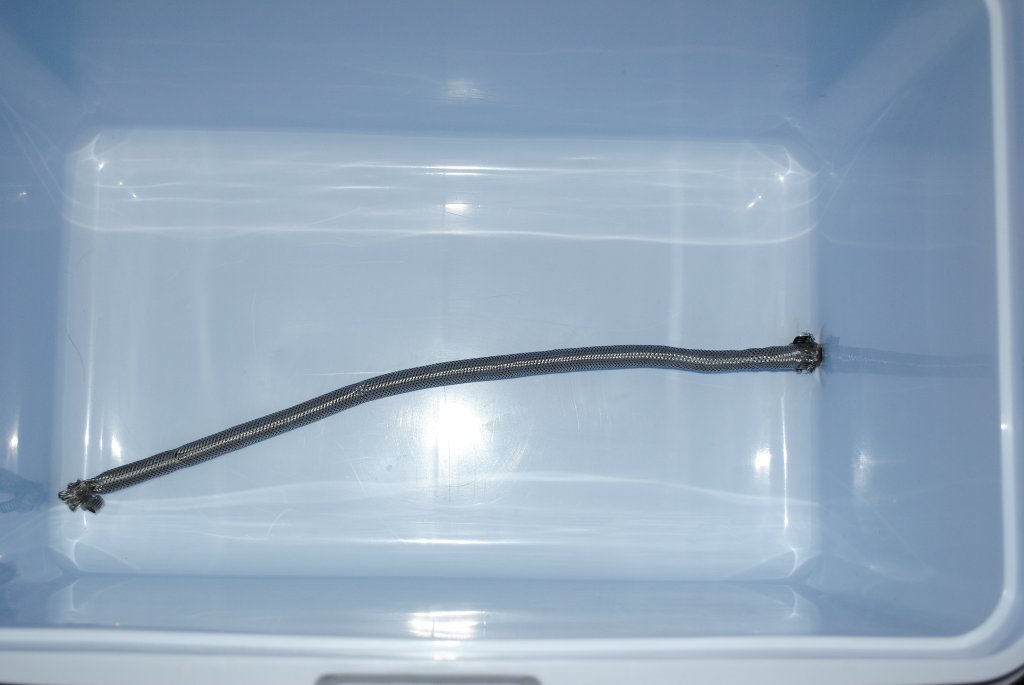 2) Create Your Filter
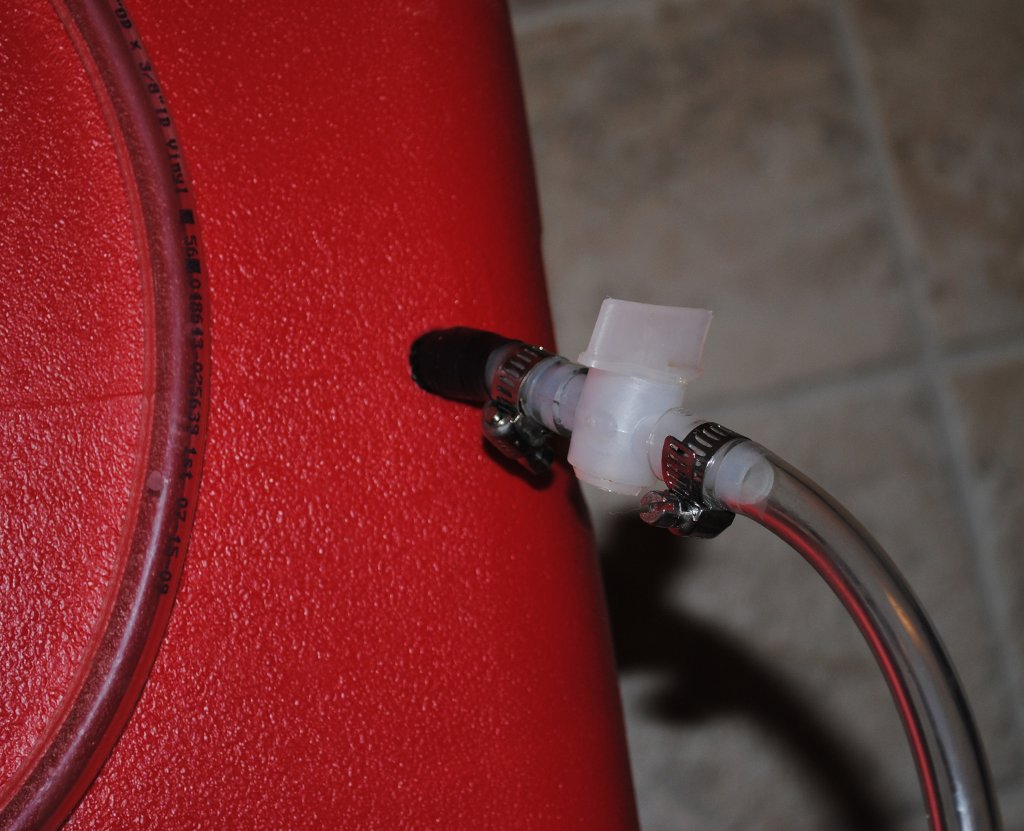 Pull the tubing out until the braided steel on touches the inside of the cooler. Now cut the tubing a couple inches away from the outside side of the cooler. Put a worm clamp over the tubing attached to the cooler then shove one of the barbed sides of the valve into the tubing. Now tighten the worm clamp to hold the valve onto the tubing. Now attach the rest of the tubing onto the other barb of the valve and clamp together.